I’ll never forget standing in my bedroom before my best friend’s wedding, staring at my gorgeous backless bridesmaid dress and feeling completely defeated. My regular bra? Totally visible. A strapless bra? Not enough support. I was about to give up when my friend tossed me a roll of boob tape and said, “Trust me on this.”
That moment changed everything about how I approach getting dressed.
Now, after two years of using boob tape for everything from date nights to black-tie events, I’ve learned what works, what doesn’t, and—most importantly—how to use boob tape without the painful mistakes I made in the beginning. If you’ve ever wondered how to tape boobs properly or felt intimidated by the whole process, I’m here to walk you through it with honest, real-world advice.
What Is Boob Tape—and Why Women Swear by It
Let me be real with you: boob tape (also called breast tape or body tape) is basically strong, skin-safe adhesive tape designed to lift, shape, and support your breasts without a traditional bra. Think of it as invisible architecture for your chest.
The best boob tape is made from medical-grade cotton or rayon with hypoallergenic adhesive—strong enough to hold everything in place through hours of wear, yet gentle enough not to damage your skin when removed properly.
I first tried boob tape when I couldn’t wear a bra with my backless dress—and it honestly changed everything. No more compromising on outfits. No more visible straps ruining my look. Just freedom to wear whatever makes me feel confident.
When You Actually Need Boob Tape
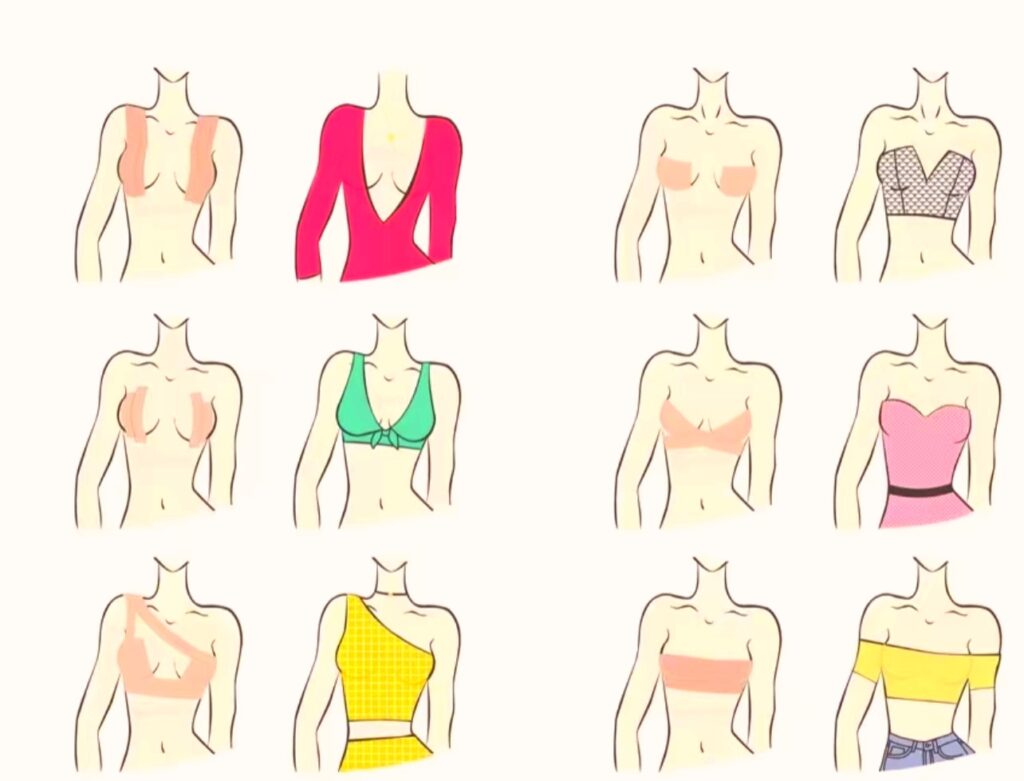
Here’s when I reach for my best body tape:
- Backless or low-back dresses (wedding season essential!)
- Deep V-necklines or plunging tops where regular bras peek through
- Off-shoulder and strapless outfits that need serious lift
- Cutout or side-slit designs where bra bands would show
- Sheer or thin fabrics where you want a smooth, seamless look
- Active events like dancing or beach parties, where you need freedom of movement
The beauty of learning how to apply boob tape is that it works for any body type. I’m a 34C, and my friends range from 32A to 36DD—we all use it successfully once we figured out the right techniques.
Step-by-Step Guide: How to Use Boob Tape Safely and Effectively
Alright, let’s get into the actual process. I’m breaking this down exactly how I do it before every event—no theory, just real steps that actually work.
Prep Your Skin (The Foundation of a Perfect Hold)
This is where I messed up the first three times. I thought I could slap on some tape and go. Wrong.
Here’s my prep routine:
- Shower and exfoliate gently – Remove any dead skin, oils, or lotion residue
- Dry completely – I mean bone-dry. Even slight moisture will weaken adhesion
- Skip all products – No lotion, no powder, no deodorant on your chest
- Apply nipple covers first – This is NON-NEGOTIABLE. I use silicone or cotton covers to protect the most sensitive areas
Pro tip: I prep my skin about 15 minutes before I plan to apply boob tape, giving my skin time to reach room temperature. If you’ve just stepped out of a hot shower, wait a bit—sweat will ruin everything.
Cut and Apply Boob Tape According to Your Outfit
This is where the magic happens. How you tape depends entirely on what you’re wearing and what kind of support you need. I’ve broken down my three go-to methods:
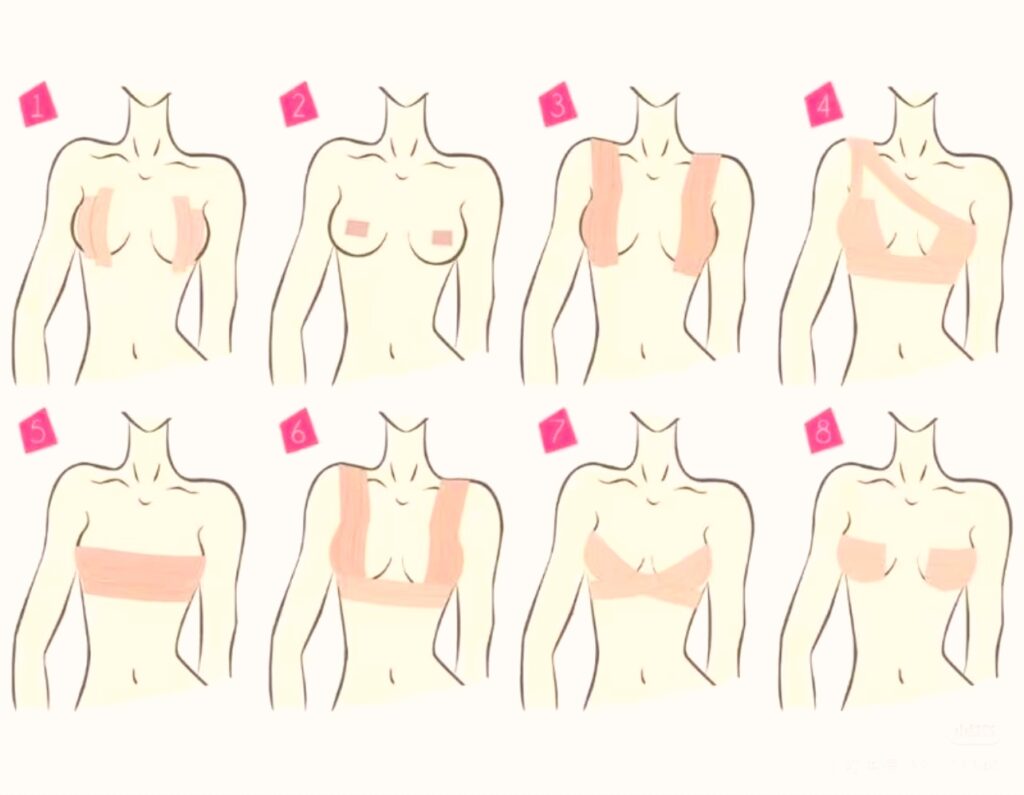
How to Tape Boobs for Strappy Tops (The Natural Lift Method)
- Best for: Tank tops, spaghetti straps, athletic wear, casual outfits
- What it does: Gives a natural lift without creating dramatic cleavage
My step-by-step process:
- Stand in front of a mirror with good lighting
- Lift your breast upward and slightly toward your shoulder with one hand
- With your other hand, place the end of the boob tape under your breast near your armpit
- While holding the lift, pull the tape diagonally upward across your chest toward your shoulder or upper back
- Press firmly to secure, smoothing out any wrinkles
- Repeat with 1-2 more strips for extra support
- Mirror the same process on the other side
My honest take: This method is perfect for small to medium busts and gives the most natural-looking result. I use this for daytime events or when I want comfort over drama.
Difficulty level: ★★☆☆☆ (Beginner-friendly)
How to Apply Boob Tape for Strapless Dresses (The U-Lift Method)
- Best for: Strapless gowns, off-shoulder tops, tube dresses, wedding dresses
- What it does: Provides maximum support with a round, lifted shape
My technique:
- Lift your breast with one hand to your desired height
- Take a long strip of the best boob tape (I usually use 12-15 inches)
- Create a “U” shape under your bust—start from the outer side, curve smoothly under, and secure on the inner side
- Add 2-3 shorter vertical strips from the bottom of the “U” upward for structure
- Seal everything with a wide horizontal strip across the top for a smooth finish
- Repeat on the other breast
Real talk: This is my go-to method for formal events and larger busts. The U-shape distributes weight evenly and prevents sagging. I wore this method for an 8-hour wedding and had zero slippage.
- Support level: ★★★★★
- Difficulty level: ★★★☆☆
How to Use Boob Tape for Deep V Outfits (The X-Cross Method)
- Best for: Plunging necklines, deep V dresses, low-cut cocktail attire
- What it does: Creates maximum cleavage and dramatic lift
How I do it:
- Push both breasts together and inward with your hands to create your desired cleavage
- From the outer side of your right breast, apply tape diagonally across toward your left shoulder
- From the outer side of your left breast, tape diagonally across toward your right shoulder
- The strips should cross in the center, forming an “X” over your sternum
- Add supporting strips from underneath if you need extra lift
- Smooth everything down carefully
My experience: This method takes practice (I messed up twice before getting it right), but the results are stunning. It’s perfect for when you want that red-carpet cleavage look.
- Cleavage factor: ★★★★★
- Difficulty level: ★★★★☆
Boob Tape Application Comparison Table
| Method | Best For | Primary Function | Support Level | Difficulty | Ideal Bust Size | My Top Tip |
| Natural Lift | Strappy tops, casual wear | Gentle lift, invisible support | ★★★☆☆ | ★★☆☆☆ | Small to medium | Start taping from your armpit area |
| U-Lift | Strapless dresses, formal events | Strong hold, round shape | ★★★★★ | ★★★☆☆ | Medium to large | Use longer strips for better coverage |
| X-Cross | Deep V necklines, party dresses | Maximum cleavage, dramatic lift | ★★★★☆ | ★★★★☆ | All sizes | Practice positioning before committing |
| Side Support | Backless gowns, side cutouts | Lateral compression, smooth sides | ★★★★☆ | ★★★☆☆ | Medium to large | Wrap from back to front |
Seal and Smooth
Here’s what I do after applying any boob tape method:
- Press firmly with my palm for 10-15 seconds on each strip to activate the adhesive
- Rub gently to create warmth—this helps the tape bond better with skin
- Check the edges and press down any corners that might lift
- Do a movement test – Lean forward, twist, raise your arms. If anything feels loose, add reinforcement strips
The best body tape for sensitive skin should feel secure but not painfully tight. If you can’t breathe comfortably or feel pulling, you’ve applied it too tightly.
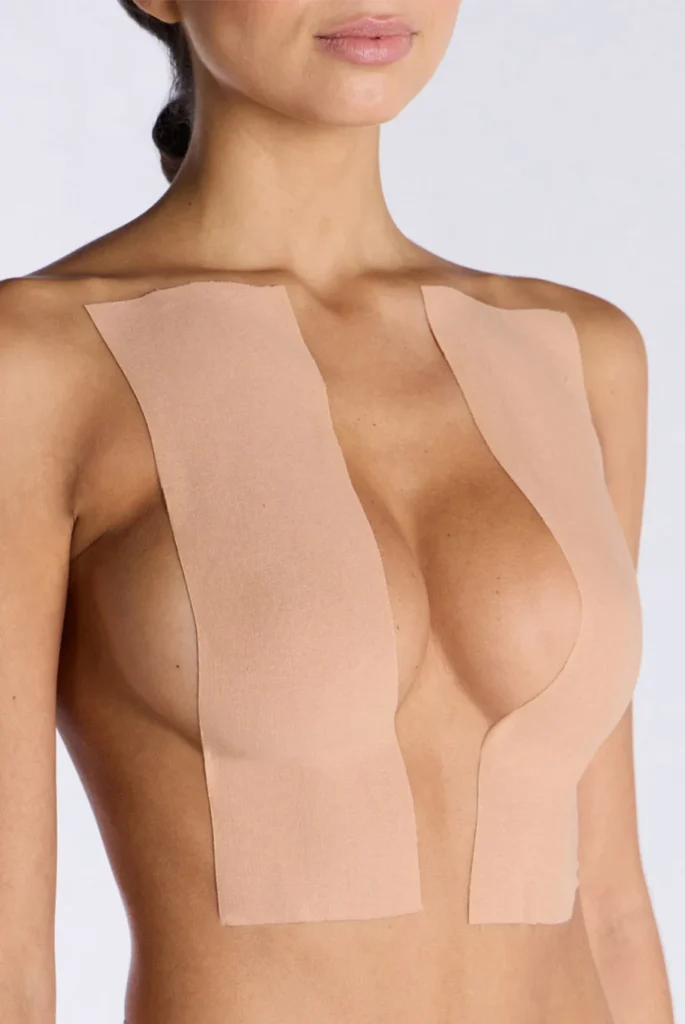
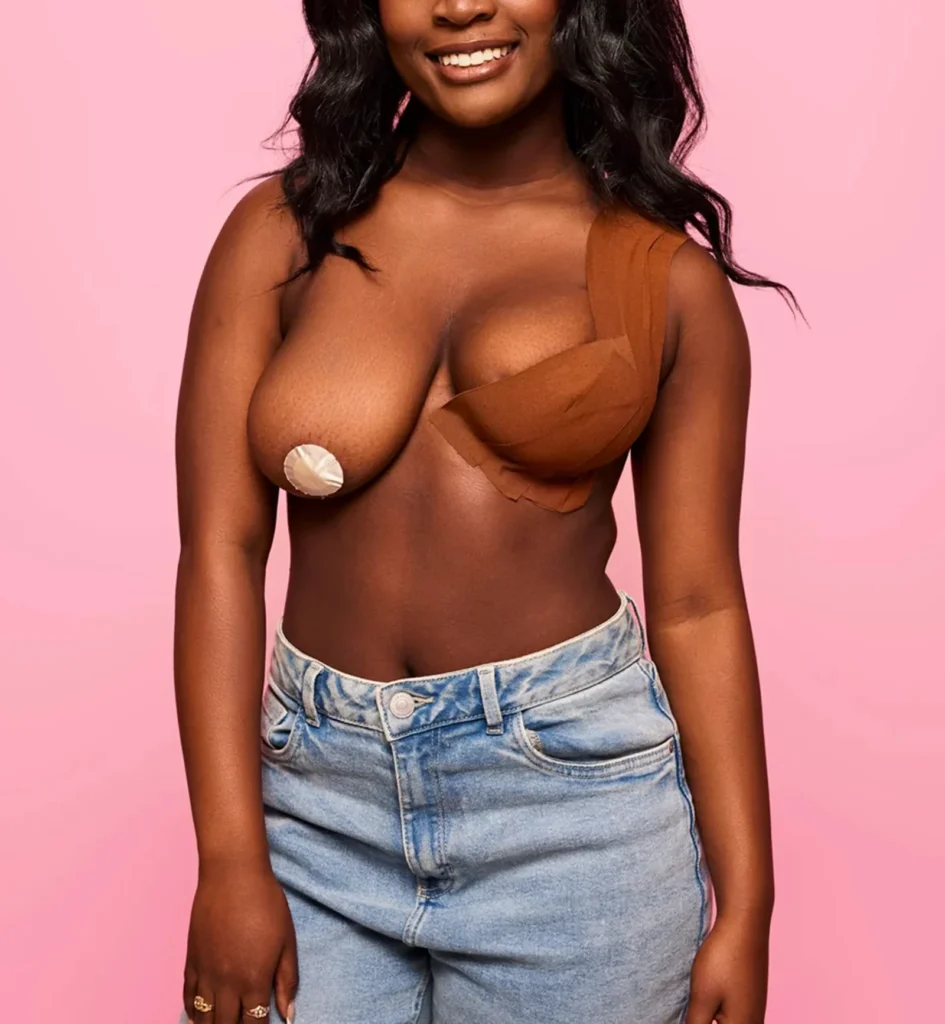
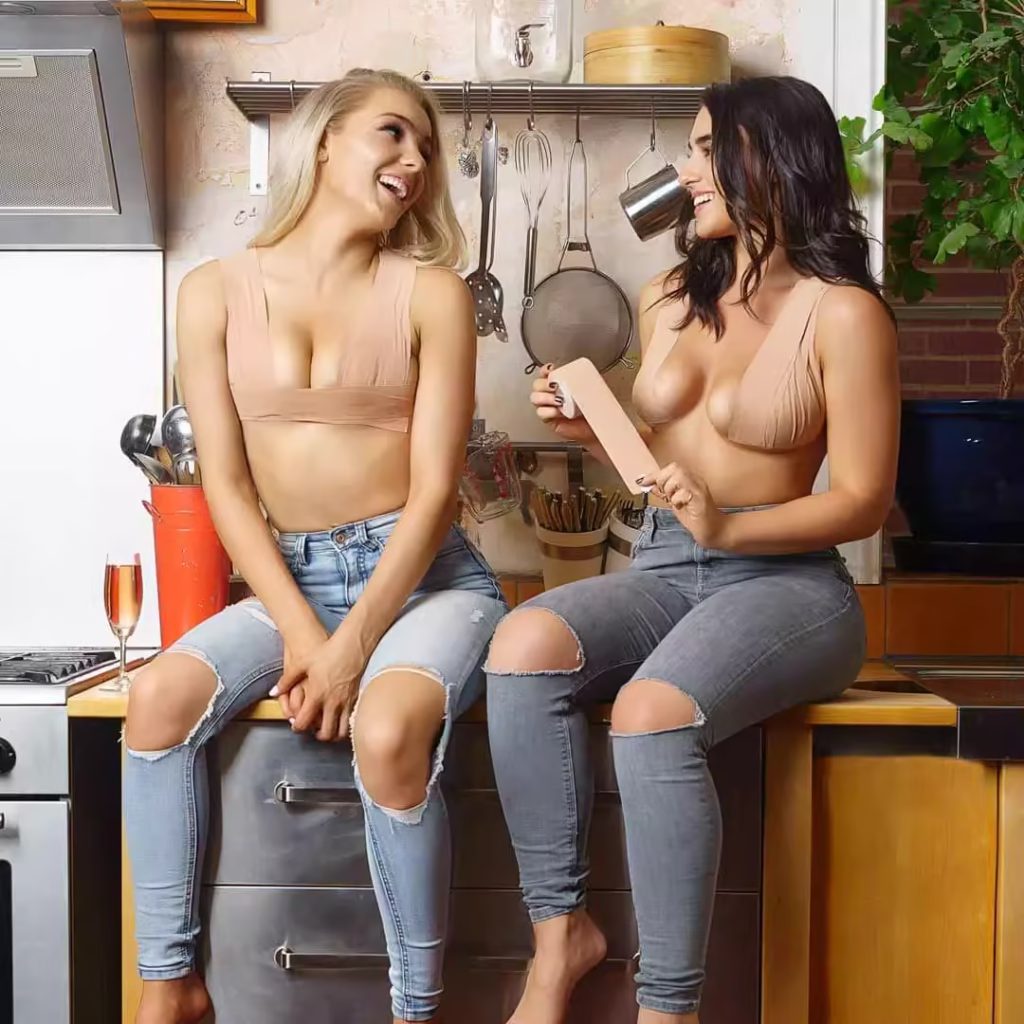
Real Try-On Results: What It Actually Looks Like
Let me paint you a picture of my first successful boob tape experience versus my first disaster.
The Disaster (What NOT to Do)
I rushed. I applied boob tape over slightly damp skin with body lotion still on. I used random tape I found online instead of proper breast tape. Result? The tape started peeling within an hour, and I spent my entire evening paranoid and adjusting my dress in the bathroom. Not cute.
The Success Story
For my friend’s wedding, I followed every step correctly. Clean, dry skin. Quality medical-grade boob tape. Nipple covers in place. I used the U-lift method under my strapless bridesmaid dress.
What happened:
- The lift was incredible—it looked like I was wearing an expensive push-up bra, but there was nothing visible
- I danced for four hours straight without a single adjustment
- My dress stayed perfectly smooth with no bra lines or bulges
- When I checked in the bathroom, everything looked exactly as it did when I left home
The before and after difference:
- Before: Flat, sagging, unsupported look that made my dress hang awkwardly
- After: Lifted, rounded, perky shape that made the dress fit exactly as the designer intended
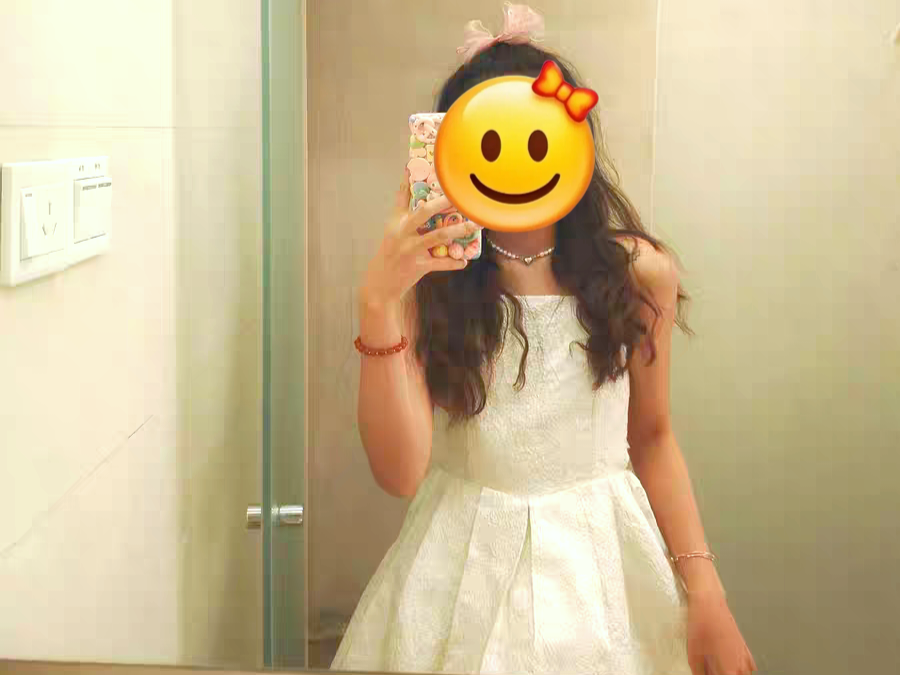
Here’s what it looked like before using boob tape—completely flat.

Here’s the boost and lift I got after putting on boob tape.
Here’s what I noticed: Good boob tape gives you the lift of a bra without a single strap in sight. The confidence boost is real. I stopped worrying about my chest and actually enjoyed the event.
Performance Comparison: Boob Tape vs. Traditional Solutions
| Feature | Regular Bra | Strapless Bra | Best Boob Tape |
| Invisibility | ❌ Straps show | ⚠️ Band may show | ✅ Completely hidden |
| Backless-friendly | ❌ No | ❌ No | ✅ Yes |
| Customizable lift | ⚠️ Limited | ⚠️ Limited | ✅ Fully customizable |
| Deep V compatibility | ❌ Shows in the center | ⚠️ May peek | ✅ Perfect for a plunge |
| Comfort (8+ hours) | ✅ Very comfortable | ⚠️ Can slip | ✅ Comfortable when applied correctly |
| Reusability | ✅ Yes | ✅ Yes | ❌ Single-use |
| Cost per wear | Low | Low | Moderate |
How to Remove Boob Tape Without Pain or Damage
This section might be the most important thing I share with you. I learned this the hard way after ripping off tape too quickly and ending up with red, irritated skin that took days to heal.
My 4-Step Painless Removal Method
| Step | Action | Why It Matters | What I Use | Time Needed |
| ① Soak | Saturate the tape completely with oil | Breaks down adhesive without pulling skin | Baby oil, coconut oil, or olive oil | 2-3 minutes |
| ② Loosen | Gently massage oil into the edges | Allows tape to release gradually | Cotton pads soaked in oil | 1-2 minutes |
| ③ Peel Slowly | Remove tape parallel to skin, not upward | Prevents skin damage and pain | Your fingers, moving slowly | 3-5 minutes |
| ④ Cleanse | Wash away residue gently | Removes sticky feeling and prepares skin | Mild, fragrance-free body wash | 1 minute |
| ⑤ Soothe | Apply calming moisturizer | Reduces any redness or sensitivity | Aloe vera gel or sensitive skin lotion | 30 seconds |
My exact removal routine:
- I soak cotton pads in baby oil and press them against the tape for 2-3 minutes
- I start peeling from one end, adding more oil as I go
- I never pull upward—always peel parallel to my skin
- I take my time (even if it takes 10 minutes—it’s worth it to avoid pain)
- After showering, I apply unscented aloe vera gel
Red flag warning: If you feel sharp pain while removing boob tape, STOP. Add more oil and wait longer. Your skin will thank you.
Tips for Sensitive Skin & Long Wear
I have combination skin that can be sensitive, so I’ve had to figure out how to use boob tape without reactions.
Sensitive Skin Safety Checklist
Before your first full application:
- Do a patch test on your inner arm for 24 hours
- Look for the best boob tape labeled “hypoallergenic” or “medical-grade”
- Avoid taping over any cuts, scratches, or irritated areas
- Never apply boob tape on sunburned skin (learned this at a beach wedding—ouch)
Signs you should remove tape immediately:
- Burning or stinging sensation
- Excessive redness beyond the tape border
- Itching that won’t stop
- Rash or bumps forming
Long-Wear Hacks for Special Events
For weddings, proms, or all-day events:
- Apply 30 minutes before getting dressed – Gives adhesive time to fully bond
- Use setting powder on the edges – Absorbs any sweat that could loosen tape
- Bring backup strips – I always keep 2-3 extra pieces in my purse
- Avoid excessive heat – If you’re outdoors in summer, find shade when possible
- Reinforce before dancing – Press down all edges before hitting the dance floor
My wedding day survival story:
I wore boob tape under my wedding dress (a low-back mermaid style) for 12 hours. Here’s what worked:
- I used the U-lift method with extra horizontal strips for reinforcement
- Applied everything 45 minutes before my ceremony
- Press firmly every few hours in the bathroom
- Stayed in air-conditioned spaces during cocktail hour
- Zero malfunctions, and my photographer captured the perfect backless shots
Anti-Sweat Strategies for Summer Events
Hot weather tips:
- Apply antiperspirant around (not on) the taping area 30 minutes before
- Use shorter strips for better ventilation
- Choose cotton-based tape instead of synthetic
- Consider taping only the areas that show (like sides for a backless dress)
- Powder your underboob lightly before applying tape
The best body tape for sweaty conditions is one with stronger adhesive and breathable fabric. I’ve found that dance-grade or athletic tape works better in humid environments than regular breast tape.
Common Mistakes to Avoid When Using Boob Tape
I’ve made every mistake in the book. Here are the ones that taught me the most painful lessons:
The 7 Biggest Boob Tape Fails
❌ Mistake #1: Applying on damp or lotioned skin
- Why it’s bad: Adhesive won’t stick properly, and tape will peel within hours
- What to do instead: Wait 15 minutes after showering, skip all products
❌ Mistake #2: Skipping nipple covers
- Why it’s bad: Painful removal and potential skin damage
- What to do instead: Always, always use silicone or fabric nipple covers first
❌ Mistake #3: Pulling tape too tight
- Why it’s bad: Restricts breathing, causes pain, and looks unnatural
- What to do instead: Lift gently—you want support, not compression
❌ Mistake #4: Using cheap, non-medical-grade tape
- Why it’s bad: Can cause allergic reactions, doesn’t hold well, leaves residue
- What to do instead: Invest in quality boob tape designed for skin contact
❌ Mistake #5: Ripping tape off quickly
- Why it’s bad: Skin damage, pain, redness, and potential scarring
- What to do instead: Use oil and remove slowly, parallel to the skin
❌ Mistake #6: Not practicing before the big event
- Why it’s bad: First-time application rarely goes perfectly
- What to do instead: Practice with your outfit at home at least once
❌ Mistake #7: Taping in the wrong direction
- Why it’s bad: No lift, awkward shape, or tape shows under clothing
- What to do instead: Always tape upward and toward your desired lift direction
Quick Troubleshooting Guide
| Problem | Likely Cause | Fix |
| Tape won’t stick | Skin not dry enough, or oils present | Clean with rubbing alcohol, dry completely, and wait 5 minutes |
| Tape is painful | Applied too tightly or on sensitive areas | Remove immediately with oil, try a lighter tension |
| No lift achieved | Wrong taping direction or insufficient strips | Retape with a more upward angle, add support strips |
| Tape showing through clothes | Edges not smoothed, or tape too thick | Use thinner tape, press edges firmly, and test the outfit before the event |
| Irritation after removal | Removed too quickly, or not enough oil was used | Soothe with aloe, avoid retaping for 48 hours |
My Honest Review & Final Thoughts
After using boob tape dozens of times across every type of event imaginable, here’s my completely honest assessment.
The Real Pros & Cons
| Pros | Cons |
| Completely invisible – No straps, hooks, or lines ever | Learning curve – Takes 2-3 tries to master |
| Ultimate freedom – Wear any neckline, back, or cutout | Not reusable – Single-use only (adds up cost-wise) |
| Customizable – You control the exact lift and shape | Time-consuming – Takes 10-15 min to apply correctly |
| Surprisingly supportive – When done right, it holds all night | Removal requires care – Rushing causes pain |
| Confidence boost – Eliminates outfit anxiety completely | Not for daily wear – Best for special occasions |
| Works for all bust sizes – I’ve helped friends from A to DD | Heat sensitivity – May loosen in extreme heat/humidity |
| No underwire discomfort – Feels like wearing nothing | Not suitable for broken or sensitive skin |
Who Should Use Boob Tape?
Perfect for you if:
- You have special events where traditional bras won’t work
- You want the freedom to wear backless, strapless, or plunging outfits
- You’re willing to invest 15 minutes in the application
- You have generally healthy, non-irritated skin
- You want a customizable lift and shaping
Maybe skip it if:
- You need daily, all-day support (regular bras are more practical)
- You have very sensitive skin that reacts to most adhesives
- You’re not comfortable with the application/removal process
- You need support for high-impact activities (sports bras are better)
My Final Verdict
Once you know how to use boob tape the right way, it’s a total game-changer. It gives me the freedom to wear anything I want—with zero bra straps and zero stress.
Yes, there’s a learning curve. Yes, it takes practice. But the confidence I feel wearing a gorgeous backless dress without constantly worrying about my bra showing? Priceless.
My practical advice:
- Start with a simple lift method on a low-stakes day
- Buy quality tape from the beginning (don’t cheap out)
- Practice before your important event
- Always prioritize safe removal over speed
- Keep backup strips in your bag for emergencies
The best boob tape I’ve found is medical-grade cotton stretch tape with hypoallergenic adhesive—it’s gentle on skin but holds strong through hours of wear. I always check that it’s specifically designed for breast support, not just generic body tape.
Bottom line: If you’ve been avoiding certain outfits because of bra limitations, give boob tape a try. Take your time learning how to apply boob tape correctly, and you’ll wonder how you ever lived without it.
Now go rock that backless dress with confidence. You’ve got this!


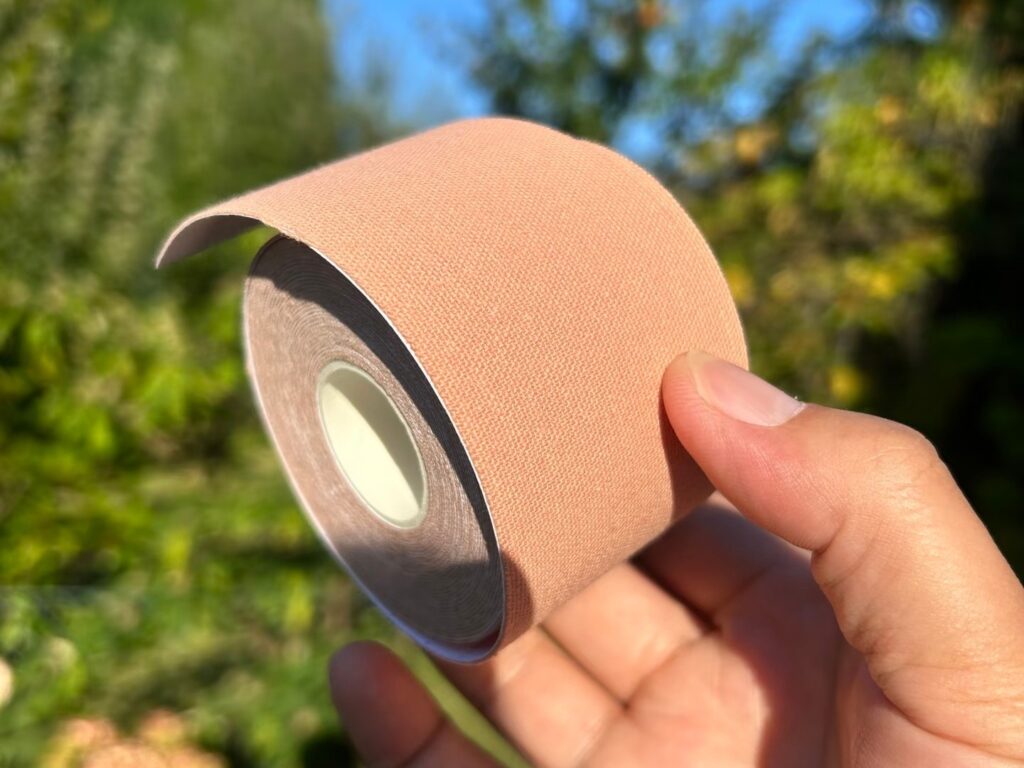


I’m so glad I found this guide! 😊 Finally learned a gentle way to remove boob tape without pain or irritation. My skin feels smooth and healthy every time.